簡介
- 本篇針對docker-compose建構airflow+mysql+rabbitmq的環境
- airflow基礎介紹與部署可參考: Airflow | 脚本东零西散?Airflow 快速搭建 pipeline(超详细)
主機環境
- 操作系统: Ubuntu 16.04.7 LTS
- 内核版本: Linux 4.15.0-142-generic
- docker-compose版本: v1.29.1
docker-compose.yml
官方docker-compose.yaml提供版本為airflow+redis+postgres,因此需修改docker-compose.yml內容
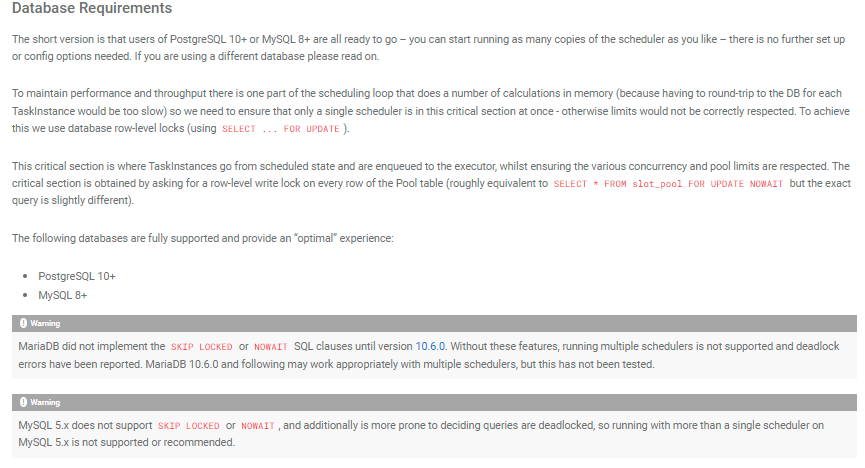
MySQL
airflow支援版本為5.7、8
因最終希望建立可彈性擴展的airflow環境,官方推薦MySQL 8+
設置MySQL帳戶密碼
若本機已安裝MySQL,需修改本機對應port
1
2
3
4
5
6
7
8
9
10
11
12
13
14
15
16
17
18
19
20
mysql:
image: mysql:8.0.27 # 下載MySQL版本為8+以上
ports:
- "3305:3306" # 區別本機MySQL port,修改對應port:3305
environment:
MYSQL_ROOT_PASSWORD: a12345 # MySQL root帳密
MYSQL_USER: airflow # airflow 於DB中的帳號
MYSQL_PASSWORD: worker # airflow 於DB中的密碼
MYSQL_DATABASE: airflow # airflow 設定檔存放的DB名稱
command: ["mysqld","--default-authentication-plugin=mysql_native_password","--collation-server=utf8mb4_general_ci","--character-set-server=utf8mb4"]
volumes:
- /app/mysqldata8:/var/lib/mysql # MySQL數據
- /app/my.cnf:/etc/my.cnf # MySQL設定檔
healthcheck:
test: mysql --user=$$MYSQL_USER --password=$$MYSQL_PASSWORD -e 'SHOW DATABASES;' # healthcheck command
interval: 5s
retries: 5
restart: always
cap_add:
- SYS_NICE
rabbitmq
- image下載management版本,可看監控畫面
1
2
3
4
5
6
7
8
9
10
11
12
13
14
15
rabbitmq:
image: rabbitmq:3-management-alpine
environment:
- RABBITMQ_DEFAULT_USER=worker # rabbitmq的使用者帳戶
- RABBITMQ_DEFAULT_PASS=worker # rabbitmq的使用者密碼
ports:
- "5672:5672" # container 對應port
- "15672:15672" # 監控畫面port
healthcheck:
test: rabbitmq-diagnostics -q ping
interval: 5s
timeout: 30s
retries: 50
restart: always
worker
- 設定host_name,以便於flower中辨別worker
1
2
3
4
5
6
7
8
9
10
11
12
13
14
15
16
17
18
19
20
21
airflow-worker:
<<: *airflow-common
hostname: host-01 # 設定host_name
command: celery worker
healthcheck:
test:
- "CMD-SHELL"
- 'celery --app airflow.executors.celery_executor.app inspect ping -d "celery@$${HOSTNAME}"'
interval: 10s
timeout: 10s
retries: 5
environment:
<<: *airflow-common-env
# Required to handle warm shutdown of the celery workers properly
# See https://airflow.apache.org/docs/docker-stack/entrypoint.html#signal-propagation
DUMB_INIT_SETSID: "0"
restart: always
depends_on:
<<: *airflow-common-depends-on
airflow-init:
condition: service_completed_successfully
x-airflow-common 環境
- image下載版本2.0以上,本範例選擇airflow2.2.3
- 變更sevice連接方式
- 變更sevice建置名稱
1
2
3
4
5
6
7
8
9
10
11
12
13
14
15
16
17
18
19
20
21
22
23
24
25
26
27
28
29
30
31
32
33
x-airflow-common:
&airflow-common
# In order to add custom dependencies or upgrade provider packages you can use your extended image.
# Comment the image line, place your Dockerfile in the directory where you placed the docker-compose.yaml
# and uncomment the "build" line below, Then run `docker-compose build` to build the images.
image: ${AIRFLOW_IMAGE_NAME:-apache/airflow:2.2.3}
# build: .
environment:
&airflow-common-env
AIRFLOW__CORE__EXECUTOR: CeleryExecutor
AIRFLOW__CORE__SQL_ALCHEMY_CONN: mysql+mysqldb://airflow:worker@mysql/airflow # 變更為mysql連線方式
AIRFLOW__CELERY__RESULT_BACKEND: db+mysql://airflow:worker@mysql/airflow # 變更為mysql連線方式
AIRFLOW__CELERY__BROKER_URL: amqp://worker:worker@rabbitmq:5672// # 變更為rabbitmq連線方式
AIRFLOW__CORE__FERNET_KEY: ''
AIRFLOW__CORE__DAGS_ARE_PAUSED_AT_CREATION: 'true'
AIRFLOW__CORE__LOAD_EXAMPLES: 'true'
AIRFLOW__API__AUTH_BACKEND: 'airflow.api.auth.backend.basic_auth'
_PIP_ADDITIONAL_REQUIREMENTS: ${_PIP_ADDITIONAL_REQUIREMENTS:-}
AIRFLOW__CORE__PARALLELISM: 64
AIRFLOW__CORE__DAG_CONCURRENCY: 32
AIRFLOW__SCHEDULER__PARSING_PROCESSES: 4
volumes:
- ./dags:/opt/airflow/dags
- ./logs:/opt/airflow/logs
- ./plugins:/opt/airflow/plugins
user: "${AIRFLOW_UID:-50000}:0"
depends_on:
&airflow-common-depends-on
rabbitmq: # 設置rabbitmq service名稱
condition: service_healthy
mysql: # 設置mysql service名稱
condition: service_healthy
設定本機對應container目錄
1 | $ mkdir ./dags ./logs |
設定airflow權限
- 確保AIRFLOW_UID為一般用戶UID
- 確保用戶擁有對應container目錄權限
1 | $ echo -e "AIRFLOW_UID=$(id -u)" > .env |
啟動docker-compose
1 | $ docker-compose up airflow-init # 初始化服務,確保container連結正常 |
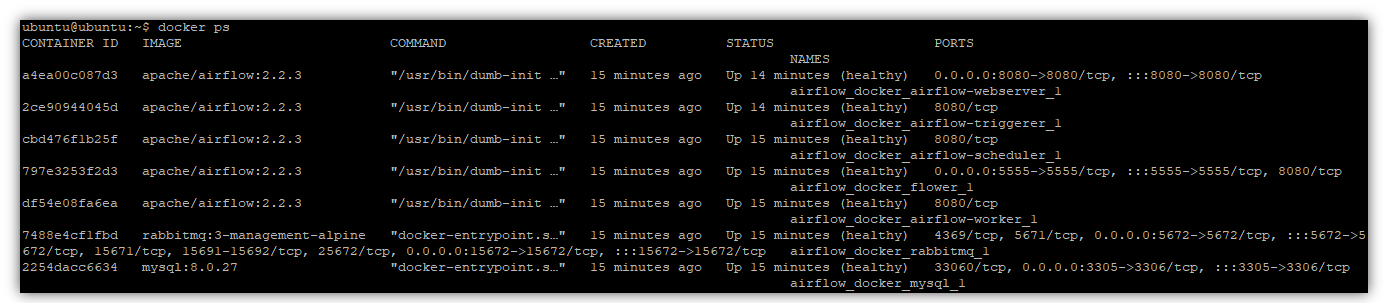
啟動後畫面
- container status: healthy
- 當container status為unhealthy,可參照docker logs <containerID> 修改bugs
完整docker-compose.yml可參考
https://github.com/Dawn0472/docker-airflow/tree/main/單機
評論